Monday, April 11, 2011

Tried something new with my Imagine

I had an idea that I wanted to try with the Imagine and it worked. Basically, I wanted to print a pattern paper and leave a blank area for stamping or printing. Here's how it came out.
To start, I printed the sentiment on a piece of cardstock that was about 6 X 8. Then, using a very thin cardstock, I cut the image to use as a mask. (I just used one that is built into the Imagine. You could use any shape.) This cut was placed over the printed area using repositionable adhesive. I chose a  5 X 7 rectangle that is also a built in cut and filled it with a pattern from the Better Together Imagine Cartridge. After it printed and cut, I removed the mask and was left with the space with my printing on it. I then cut it to the standard 4.25 by 5.5.  The masked area was outlined with an MS gold glitter marker. The house image is also from the Better Together Cartridge and is pop dotted to the card base. I added blue baker's twine from Jilly Bean Soup and tied the key charm to it. The charm was silver, but I "painted" it gold with a Copic marker (Y26, Mustard). It is adhered to the card with tiny pop dots.The key also hides a spot where the marker decided to leak leaving a puddle that I had to wipe up. I got most of it, but it did smear some. Of course, it couldn't have happened on the side that the house covers!
I enjoy learning and trying new techniques, especially when they work! I can see this working well for stamped images too. I'll have to try that next.
Thanks for stopping by!
Maria

Saturday, April 2, 2011

Just for You

Hello! I am loving the new Elegant Edges cartridge. It is chalk full of frames and borders and a lot of them are perfect to use with stamps. For this card I used just the shift feature of the cut and cut it in two sizes. I measured the stamp first, then made the cut accordingly. I think it worked perfectly with the stamp.
  The printed background paper is from Cosmo Cricket, Garden Variety.  The peach floral paper is from an old Provo Craft stack. Large classic and scallop Nestabilities were used for the brown and peach rectangle cuts. The tag was made with the Elegant Edges cartridge using the oblong leaves-s on pg 29 in the handbook. The stamp is from Inkadinkado, Garden Greetings. It was heat embossed with Ranger black embossing powder then colored with Stampin Up markers.
Thanks for stopping by,
Maria

Sunday, March 27, 2011

Elegant Edges Card

I made this card for this week's Circle Weekend Challenge. The challenge was to use some type of embossing. I love the Cuttlebug and embossing folders, so this was perfect for me. I also got to play with the new Elegant Edges cartridge, which I think will be one of my favorites!
This card is 4.25" square.
Solid red paper is DCWV Amber Autumn stack, printed paper is DCWV Mango Frost stack
Ribbon is Offray.
Button from Michael's dollar bin, twine from Walmart
Tag from Stampin Up . Also used More Mustard ink for edging and Chocolate Chip for stamped sentiment.
Hello stamp from Hero Arts Everyday sayings set.
Die cut is from Elegant Edges, cut at 3.5". There are two layers, a solid red one underneath.
Glitter is MS Carnelian Red.
The embossing is a Cuttlebug embossing folder, unfortunately I don't have the name of it!
It was good to get back in my room and get crafting again. I hope to get a couple of more cards done today as well.
Thanks for stopping by!
Maria

Thursday, March 17, 2011

Another nice surprise

Okay, apparently I need to visit my own blog more often. I have had two more people honor me with this award in the past two months. The first was Vickie at kraftkorner.blogspot.com  and then just a few days ago Caroline at carolinescraftography.blogspot.com . Thank you so much ladies! I am honestly make an effort to post more so that I can feel worthy of these awards! I am supposed to pay it forward to 8 other blogs and I will be back later to do that.
Thanks for stopping by!
Maria

Friday, March 4, 2011

Valentine's gift card holder

Even though my kids are grown I still give them little gifts for all the holidays. For Valentine's day the girls usually get a cute pair of socks, maybe a small box of candy. This year I decided to include a gift card to a local grocery store. Figured that way if they couldn't go out to eat with their husbands they could at least enjoy a good home cooked meal!
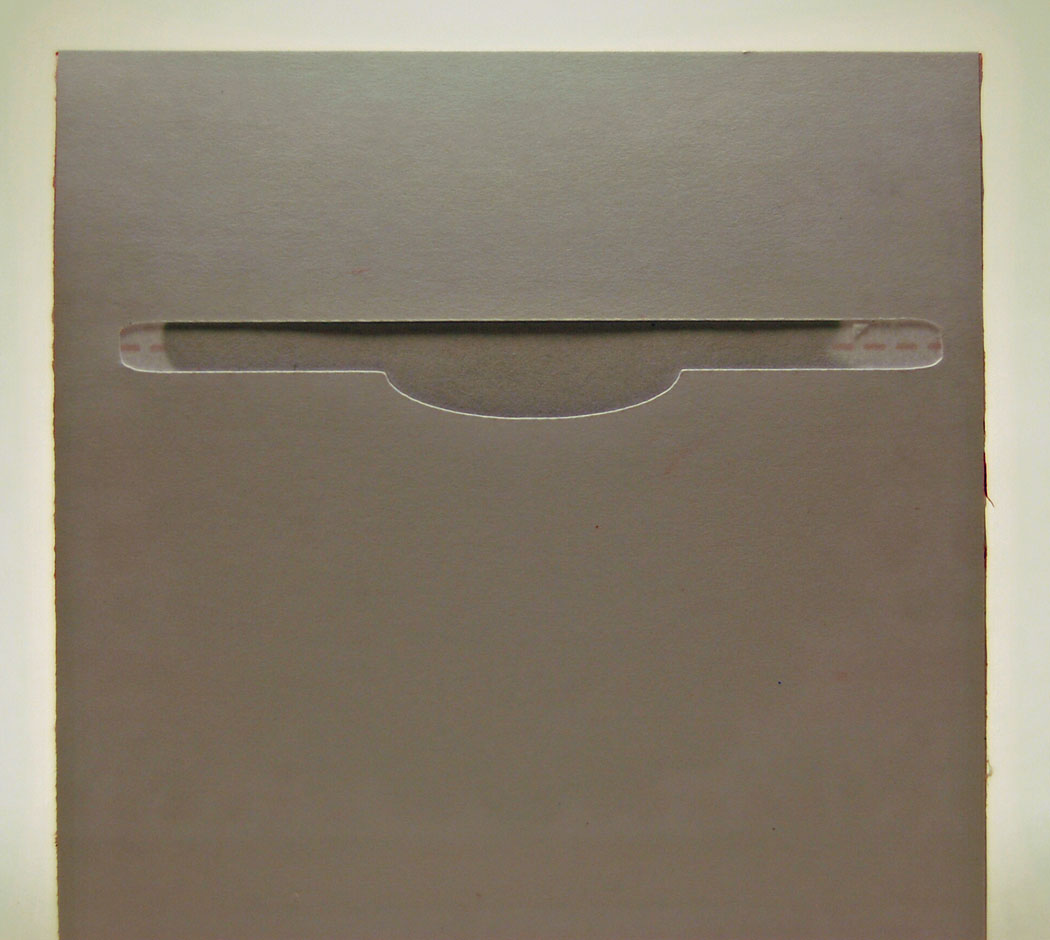
A few years ago I created a file on the Gypsy for a gift card holder. It's basically a 41/2" by 9" rectangle with a slot in it big enough to hold a standard gift card. Here's what the inside looks like when it's cut and folded in half.
Then I make a 41/2" X 41/2" cover to place on the outside. That's what creates the pocket for the card to go in. Just have to be careful not to put adhesive anywhere that will interfere with the card going in.
This is one of the one's I made for Valentine's Day this year. The cuts are from the Cricut Simply Charmed cartridge and the little ladybug is attached to it with an Action Wobble. It's really cute in person, those things really do work! The background paper is We Are Memory Keepers, Be My Valentine. I finished it off with a Martha Stewart border punch and some ribbon from Michael's. Oh, and some red Stickles on the heart.
Hope my explanation of the gift card holder makes sense. I'll try to remember to take more pictures next time I make some.
Thanks for stopping by!
Maria

Wednesday, March 2, 2011

Cricut Everyday Cartridge Project and a Challenge

Hi there! One of the benefits of being a member of the Cricut Circle is the exclusive cartridge we receive every quarter. This quarter's cart is Cricut Everyday. It is full of images of all the Provo Craft products, has 2 cricut fonts and some really great phrases, all scrap and paper craft related. This month the Circle magazine challenge was to create something with the new cartridge. The only other rule was that we had to include 3 cuts from the cartridge. I decided to play along and actually came up with something I think is pretty creative, at least for me! When I first saw this phrase, I thought of the panhandlers holding up their signs, but decided that wouldn't really be appropriate. Then I remembered this girl from the Country Life cart, and well, the whole thing just came together. So, here it is:


I created the main image on the Gypsy, welding a rectangle to the bottom of the girl and cutting it out of chipboard. The bottom of  the rectangle is folded back about 2" to create a little shelf. I then cut all the layers for the girl and added several embellishments. I used red flock on her hat and added some small rhinestones. The cartridge box was cut at 11/2" but I had to cut the bug head at 21/2" in order to get it big enough for the antennae not to fall off! I used foam tape to adhere him to the box, then more to adhere the  box to the project. I used Lime Green Stickles on the bug head too. The phrase was cut as is, using the regular and shadow feature. The third cut is the little Circle Symbol on her guitar, also covered with Lime Green Stickles. I still thought is was missing something, so I created a picket fence (or should I say Cricut fence?) by welding several pound signs together on the Gypsy. Then I added a piece of green ric rac to finish it off. I found 2 small plastic boxes that I glued to the back and will use them to hold my calling cards. I plan to have this on my table at the Stampede.
Hope you enjoyed seeing my little singing cowgirl. It was a lot of fun creating her! If you are going to the stampede, I hope we get a chance to meet. I'm really looking forward to it!
Thanks for stopping by!
Maria

Monday, February 21, 2011

Groovy Times Birthday Card

When I first saw this cartridge I knew I had to have it. I can relate to so many of the images on it! A dear friend recently celebrated a birthday, and since he is the oldest of our group (by a few months) we always tease him about being older than the rest of us. He takes it well though and it's always all in good fun. By the way, he and my husband have been friends since middle school and he and his wife and Tim and I used to double date in high school. We somehow all ended up here in Texas together and are the best of  friends.


This card was different for me. It is a tri-fold and a little bigger than I usually make. (sorry, I didn't write down the dimensions.) All the cuts are from the Cricut Groovy Times Cartridge. The printed paper is from the DCWV  Peace, Love, Happiness stack, a perfect match for the cartridge! The font on the last page is from the Lite Feeling Groovy cartridge. I made up the poem and it was generated in word. I'm just glad my friend has a sense of humor!
Thanks for stopping by!
Maria

NSD 2015 Challenge: Leave You In Stitches

Hi all and welcome to my blog. It's been a long time since I've posted here, but I'll fill you in on that another time.  Today, ...